Author

Tiffany Lucas

Wooden spoon stirring sticky rice in a copper cooking pot

Shirataki rice has gained popularity among health-conscious individuals who are on low-carb or ketogenic diets. This unique rice alternative is derived from the konjac plant, renowned for its high fiber and low-calorie content. With more people seeking healthy substitutes, mastering the preparation and cooking of Shirataki rice becomes essential to enjoy its benefits fully. If you want to explore the nuances of Shirataki rice and achieve the perfect texture, read on.

Understanding Shirataki Rice and Its Benefits

What Is Shirataki Rice?

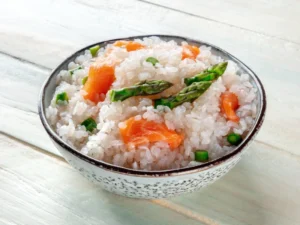
Shirataki rice, often referred to as “Miracle Rice,” is derived from the konjac plant’s root, which is primarily found in Asia. The root is processed into a gelatinous substance called glucomannan, which is shaped into rice-like grains. This rice alternative has gained traction due to its unique properties: it contains nearly zero calories and carbohydrates—and is rich in soluble fiber. The rice grains are transparent and have a slightly chewy texture, making them an intriguing addition to various dishes.

Incorporating Shirataki rice into your meals can open up endless culinary possibilities. It absorbs flavors well, allowing it to blend seamlessly with other ingredients. Given its low calorie and carbohydrate content, many people use Shirataki rice to help them feel full without the accompanying caloric baggage.

Nutritional Advantages of Shirataki Rice

Here are some key nutritional advantages of Shirataki rice:

VirtueDetails
Low in CaloriesContains approximately 10 calories per serving.
High in FiberRich in glucomannan, promoting digestive health.
Low in CarbsNearly zero carbohydrates, excellent for low-carb diets.
Gluten-FreeA safe choice for those with gluten intolerance.
VersatileCan be used in various recipes, adapting to many flavors.

These features make Shirataki rice not only a fantastic substitute but also an ally in maintaining a healthy lifestyle.

Preparing Shirataki Rice for Optimal Texture

Step-by-Step Guide to Rinsing and Boiling

Steamed white rice in a ceramic bowl with chopsticks nearby

Photo from: https://thehouseofgoodies.com/products/dried-shirataki-rice

To prepare Shirataki rice correctly, a thorough rinsing and boiling process is vital to eliminate its natural odor, which could impact the taste if left unchecked. Here’s a simple step-by-step guide to properly prepare Shirataki rice:

  1. Rinse: Open the package and pour the Shirataki rice into a sieve or strainer. Rinse the rice under cold running water for about 2-3 minutes. This step washes away any excess water and the slightly fishy smell that often accompanies Shirataki rice.
  2. Boil: After rinsing, bring a pot of water to a rolling boil. Add the rinsed Shirataki rice to the pot and boil for about 2-3 minutes. Boiling not only helps in softening the rice but also further eliminates the odor.
  3. Drain & Dry: Once boiled, drain the rice and let it rest in the strainer for another minute. For best results, transfer it to a pan over low heat for about 5-7 minutes, stirring occasionally until most of the moisture evaporates.

Important Tips for the Best Texture

Achieving the perfect texture with Shirataki rice relies on a few critical tips:

  • Don’t Overcook: Overcooking can lead to a mushy consistency. Just a few minutes in boiling water are sufficient.
  • Dry It Out: Moisture can lead to a slippery texture. Using a dried-out pan will create a firmer consistency.
  • Stir Frequently: Stirring while cooking allows even heat distribution.

These tips will elevate your Shirataki rice experience from merely adequate to truly satisfying.

Cooking Shirataki Rice: Techniques and Tips

Simple Cooking Methods

Bowl of steamed rice garnished with black sesame seeds and spoon

Photo from: https://iheartumami.com/shirataki-rice/

Once you’ve prepared the Shirataki rice, how you cook it will enhance its taste and integration in your meals. Here are some straightforward cooking methods:

  • Sautéing: Heat a tablespoon of oil (like olive oil or sesame oil) in a pan, then add your prepared rice along with your choice of vegetables or protein. Stir-fry until heated through for a quick and flavorful dish.
  • Adding to Soups: Shirataki rice can be tossed directly into your broths and soups. Just add it toward the end of the cooking process to warm it up and achieve a delightful texture.
  • Baking: Incorporate boiled Shirataki rice into casserole dishes. This can create a hearty meal that retains all the benefits of the rice.

Flavoring Your Shirataki Rice

Since Shirataki rice has a subtle flavor, it’s essential to infuse it with taste. Here are some effective flavoring techniques:

  • Soy Sauce or Tamari: A splash of soy sauce can elevate the rice’s flavor dramatically. This is particularly effective in stir-fries.
  • Herbs and Spices: Experiment with garlic, onion powder, ginger, or fresh herbs like cilantro or basil. These additions can create a depth of flavor.
  • Stock or Broth: Using vegetable or chicken stock instead of water during the cooking process will impart a richness that is hard to resist.

Frequently Asked Questions About Shirataki Rice

Can Shirataki Rice Be Used in Any Recipe?

Indeed, you can integrate Shirataki rice into a wide variety of dishes. It serves as a substitute in recipes calling for traditional rice, such as stir-fries, sushi, or even risotto. Its versatility allows it to adapt to various cuisines, so feel free to experiment!

How Long Does Cooked Shirataki Rice Last?

Once cooked, Shirataki rice can be stored in the refrigerator for up to 5 days if kept in an airtight container. Just reheat it before use, and it will retain its flavor and texture!

Is Shirataki Rice Gluten-Free?

Shirataki rice is naturally gluten-free, making it ideal for those with gluten sensitivities. It contains no wheat, grains, or gluten, so you can enjoy it without concerns.

Where Can I Buy Shirataki Rice?

You can find Shirataki rice in many grocery stores, health food shops, or online. Stores like Whole Foods or other natural food retailers often stock this product. Online platforms like Amazon also offer various brands and types of Shirataki rice, making it convenient for those looking to try it out.

Conclusion

Mastering Shirataki rice boils down to understanding its unique properties and ensuring its proper preparation and cooking techniques. By following the guidelines outlined above, you can transform Shirataki rice into delicious, satisfying meals while enjoying its myriad health benefits. Whether you’re looking for a low-carb alternative or simply want to try something new, Shirataki rice is a fantastic choice. Happy cooking!


0 comments
0 FacebookTwitterPinterestEmail
A bowl of steamed white rice with green onion garnish

In the quest for healthier eating, many individuals turn to alternative options to staples like rice. One such contender, Shirataki rice, has rapidly gained popularity as a healthy substitute in diverse diets. But what exactly is Shirataki rice, and why is it regarded as a smart choice? This article delves into the ingredients, health benefits, cooking methods, and answers to frequently asked questions, revealing how Shirataki rice can transform your meals and support your wellness goals.

What Is Shirataki Rice and How Is It Made?

A freshly harvested yam root held by a person outdoors

Photo from: http://www.konjacfoods.com/

Shirataki rice comes from the konjac plant, specifically the konjac flour created from its roots. This unique flour consists primarily of a soluble fiber known as glucomannan, which absorbs water and swells into a gel-like consistency. The process of making Shirataki rice involves mixing konjac flour with water to create a formation that mimics traditional rice.

Traditionally utilized in Japanese cuisine, this rice alternative is often packaged in liquid or dry form. The liquid version requires rinsing and draining before cooking. For the dry version, a quick soak and heating will suffice. Shirataki rice embodies a perfect blend of convenience and health, making it a popular choice among health-conscious eaters and those looking to reduce their carbohydrate intake.

The Konjac Plant and Its Uses

The konjac plant, native to Asia, has been cherished for centuries, not only for its culinary uses but also for its medicinal properties. Its starchy root is rich in glucomannan, which has been associated with several health benefits, including weight loss and digestive health. In addition to Shirataki rice, the konjac plant is often processed into noodles, gels, and even desserts, showcasing its versatility in many recipes.

Top Health Benefits of Shirataki Rice

As the world pivots toward healthier alternatives, Shirataki rice stands out for several reasons. Let’s explore its top health benefits that contribute to its rising recognition as a nutritious choice.

Low-Calorie Option for Weight Management

One of the most appealing aspects of Shirataki rice is its low-calorie profile. With mere 10 calories per serving, it offers a guilt-free alternative that those wishing to manage their weight can appreciate. By substituting conventional rice with Shirataki rice, individuals can reduce calorie intake without sacrificing volume or satisfaction. This makes it easier to enjoy filling, balanced meals while still achieving weight loss goals.

Rich in Dietary Fiber

Shirataki rice shines as an excellent source of dietary fiber due to its glucomannan content. Fiber is vital for maintaining a healthy digestive system, and increasing fiber intake can lead to reduced cholesterol levels and improved gastrointestinal function. Consumption of fiber-rich foods can also help with feelings of fullness, reducing the likelihood of overeating.

Supports Blood Sugar Control

For individuals monitoring their blood sugar levels, shirataki rice provides another advantage. Its low glycemic index means it produces only minor spikes in blood sugar after consumption, making it suitable for those with diabetes or anyone seeking to stabilize energy levels. The fiber in Shirataki rice contributes to slow digestion, allowing for gradual absorption of glucose, which helps maintain steady blood sugar.

Gut Health and Digestion Benefits

The fiber found in Shirataki rice can boost overall gut health by providing nourishment for beneficial gut bacteria. As these bacteria ferment the soluble fiber, they produce short-chain fatty acids that can enhance the health of colon cells and potentially reduce the risks of colon cancer. Improved digestion also leads to better nutrient absorption, reaffirming Shirataki rice’s role as a beneficial food choice.

How to Cook with Shirataki Rice

A bowl filled with fluffy, freshly cooked white rice

Photo from: https://konjacbites.com/shirataki-rice-gluten-free-and-zero-calorie-miracle-rice/

Shirataki rice is as versatile as it is healthy. Experimenting with various recipes can unlock its full potential as a meal staple.

Easy Preparation Techniques

Preparing Shirataki rice is straightforward:

  1. Drain and Rinse: Gently drain the content from the package and rinse the rice under cold water for a couple of minutes. This helps eliminate any odor that often accompanies the product.
  2. Cooking: Place the rinsed rice in a non-stick skillet and heat over medium for about 5-10 minutes. It’s essential to cook until it evaporates some of the water to achieve a fluffy texture.
  3. Flavoring: Stir in your choice of spices or sauces, combining well to integrate flavors into the dish. The rice will absorb the essence of whatever you add.

Tasty Shirataki Rice Recipes

Here are a couple of delicious ideas to get started:

  • Shirataki Fried Rice: Sauté your favorite vegetables like bell peppers, carrots, and peas with some scrambled eggs or tofu, and add rinsed Shirataki rice. Flavor with soy sauce, ginger, and sesame oil for a hearty dish.
  • Shirataki Rice Salad: Combine Shirataki rice with cucumbers, tomatoes, and bell peppers in a fresh salad. Add a tangy vinaigrette and some herbs for a refreshing meal option.
RecipeKey IngredientsCooking Time
Shirataki Fried RiceShirataki rice, mixed vegetables, soy sauce15 minutes
Shirataki Rice SaladShirataki rice, cucumbers, tomatoes, herbs10 minutes

Addressing Common Questions About Shirataki Rice

  1. Is Shirataki rice gluten-free?
    Yes, Shirataki rice is naturally gluten-free, making it a suitable choice for those with gluten sensitivities or celiac disease.
  2. Can you eat Shirataki rice cold?
    Absolutely! Shirataki rice can be chilled and used in salads or cold dishes just like traditional rice.
  3. Does Shirataki rice taste like rice?
    While Shirataki rice has a unique texture, it absorbs flavors well, making it easy to enjoy in various recipes where rice is typically used.
  4. How does Shirataki rice compare to other rice alternatives?
    Shirataki rice stands out for its extremely low-calorie content, high fiber, and lack of simple carbohydrates, providing a fantastic option compared to other substitutes.

In conclusion, Shirataki rice presents an attractive, health-oriented alternative for anyone looking to maintain a balanced diet while still enjoying their favorite meals. With its low-calorie profile, fiber-rich attributes, and culinary flexibility, it’s time to consider integrating Shirataki rice into your culinary repertoire. Whether you’re aiming for weight management or simply aiming to elevate your nutrition, Shirataki rice is a smart, healthy choice worth discovering.

0 comments
0 FacebookTwitterPinterestEmail
A bowl of fluffy white rice with chopsticks beside it

In a world where dietary choices often feel like a balancing act, finding guilt-free alternatives can seem like a daunting task. Shirataki rice, affectionately known as “miracle rice,” has emerged as a beloved substitute, offering a low-calorie option without sacrificing fullness. If you’re interested in exploring this innovative rice alternative, then let’s embark on this delicious journey together.

Discovering Shirataki Rice: What Is It?

A bowl of sushi rice topped with salmon and asparagusAt first glance, you might mistake shirataki rice for the regular rice pantry staple that graces many tables. However, shirataki rice is quite different. This rice is made from the root of the konjac plant, and it’s composed almost entirely of water and soluble fiber, resulting in its low caloric value.

The texture of shirataki rice might take some getting used to. Its gelatinous, slightly chewy consistency can contrast with the fluffy and starchy nature of traditional rice. This rice alternative lacks the carbs that most people associate with a filling meal, making it an attractive option for those monitoring their dietary intake.

Introducing Shirataki: A Low-Calorie Wonder

So, how low can the caloric count actually go? Shirataki rice boasts an astonishing 10 to 20 calories per serving, depending on the brand. This means that you can indulge in a generous serving without worrying about your overall caloric intake. For those on a weight-loss journey, shirataki rice allows you to eat more volume while consuming fewer calories.

When you consider how easy it is to enjoy a satisfying serving without the guilt, shirataki rice stands out. Plus, it can be integrated into countless dishes, from stir-fries to curries, making it adaptable to various cuisines and flavors.

Glucomannan: The Secret Ingredient

Freshly harvested yacon roots placed on a tree stump outdoors

Photo from: https://www.verywellhealth.com/glucomannan-benefits-side-effects-dosage-7570330

The reason shirataki rice is so low in calories lies in its primary ingredient: glucomannan. This remarkable soluble fiber essentially swells in your stomach upon absorption of water, creating a gel-like substance. The result is a sensation of fullness that can help curb appetite and prevent overeating.

For many people, overeating is one of the main culprits of weight gain. By introducing glucomannan into your diet, shirataki rice can play a significant role in regulating hunger. Not only does it help manage cravings, but it also has potential benefits for individuals looking to stabilize blood sugar levels.

The Origins of Shirataki Rice

Shirataki rice has deep roots in Asian cuisine, particularly in Japan. The konjac plant has been cultivated for centuries, often primarily used for making konjac noodles. As culinary creativity flourished, chefs began to explore new uses for konjac, leading to the advent of shirataki rice.

Today, the rise in popularity of low-carb diets has made shirataki rice more common in health-conscious kitchens all around the world. Its chewy texture and ability to absorb flavors make it an exciting addition to many dishes, and it continues to gain loyal fans eager to explore new diet-friendly recipes.

Health Benefits of Shirataki Rice

Beyond just being an intriguing rice alternative, shirataki rice offers a variety of health benefits. Whether you’re dipping your toes into the health world or are already on a wellness journey, understanding these advantages can help you see the potential of shirataki rice.

Weight Loss Friendly

A woman pulling the waistband of her loose blue jeansFor individuals focused on weight loss, shirataki rice is an excellent friend. Its minimal calories mean you can enjoy larger portions without the weight gain that often accompanies larger servings of traditional rice. This helps alleviate feelings of deprivation that often accompany dieting.

Research suggests that increasing fiber intake can lead to weight loss due to the increased fullness that fiber provides. Shirataki rice is quite high in fiber due to its glucomannan content, making it very weight-loss friendly. The good news is that you can enjoy dishes you love without the added carbs and calories that come with traditional rice.

Diabetic Friendly

For people managing diabetes, selecting the right foods can pose challenges. Shirataki rice is a fantastic option due to its negligible sugar content. It won’t send your blood sugar levels soaring, making it an ideal addition to meals for those looking to maintain stable glucose levels.

Glucomannan’s properties can even contribute to improved insulin sensitivity. Pair this with a balanced diet, and shirataki rice can become a part of a healthy lifestyle for individuals managing diabetes.

Nutritional Profile Compared to Regular Rice

To better understand the benefits of shirataki rice, let’s take a closer look at its nutritional profile compared to regular rice. The disparity is striking and worth noting.

NutrientShirataki Rice (1 cup)White Rice (1 cup)Brown Rice (1 cup)
Calories10-20205215
Carbohydrates1g45g45g
Dietary Fiber3g1g4g
Protein1g4g5g
Fat0g0g2g

This table summarizes the noticeable contrasts between shirataki rice and traditional rice options. The low-calorie count, minimal carbohydrates, and higher fiber content underscore shirataki rice’s appeal as a healthier choice.

How to Prepare Shirataki Rice

Are you excited to try shirataki rice? Cooking it may be simpler than you think. With just a few steps, you can transform this unique rice alternative into a dish that delights your taste buds.

A hand washing white rice grains in a stainless bowl
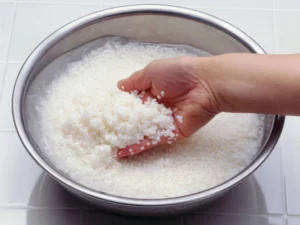
Step-by-Step Cooking Guide

  1. Drain and Rinse: Start by draining the shirataki rice from its packaging. Rinse it thoroughly under cold water for several minutes. This step helps remove any unwanted odor.
  2. Boil: Next, bring a pot of water to a boil and gently add the shirataki rice. Boil for 2 to 3 minutes to help firm up the texture and reduce any lingering odors.
  3. Sauté: After boiling, drain the rice yet again. You can sauté it in a non-stick pan for about 5-10 minutes. This will help evaporate any leftover moisture and enhance the overall texture.
  4. Serve: Finally, it’s ready to integrate into your favorite dishes! Use it in stir-fries, savory soups, or as a base for warming curries.

Tips for Flavoring Shirataki Rice

While shirataki rice has a mild flavor on its own, enhancing it with the right ingredients can create a truly delicious dish. Here are some thoughtful suggestions to infuse flavor into your meal:

  • Soy Sauce or Tamari: A splash of either can work wonders in giving the rice a rich umami taste.
  • Garlic and Onions: Sautéed garlic and onions elevate the aroma and taste of shirataki rice.
  • Broth: Cooking the rice in flavorful broth instead of water can dramatically change the flavor profile of the dish.
  • Herbs and Spices: Don’t hesitate to experiment. Incorporate any spices or herbs you enjoy, such as curry powder, cilantro, or even a blend of Italian herbs, for a fragrant finish.

Common Mistakes to Avoid

Mistakes can happen, especially when trying something new. Here are a few common pitfalls to avoid:

  1. Skipping the Rinse: Rinsing the rice is a vital step in the process. This drastically improves the taste and texture of your dish.
  2. Overcooking: Be cautious not to overcook the rice during boiling or sautéing, as this can lead to a mushy mishap.
  3. Not Flavoring: Recognize that shirataki rice can taste bland on its own. Always integrate it with flavorful sauces or seasoning to enhance the overall experience.

Ways to Incorporate Shirataki Rice into Your Diet

A bowl of fried rice mixed with vegetables, eggs, and mushrooms

Photo from: https://www.youtube.com/watch?v=mneo2GQC04k

Now that you are equipped with the basics of cooking, it’s time to explore how to integrate shirataki rice into your meals meaningfully. It can be an exciting addition to your dietary routines.

Delicious Shirataki Rice Recipes

Are you looking for inspiration? Here are a few tasty recipes that incorporate shirataki rice:

  1. Stir-Fried Shirataki Rice: Sauté it with colorful vegetables like bell peppers, broccoli, and carrots. Add a dash of soy sauce, and you have a quick, gratifying meal.
  2. Shirataki Rice Risotto: Create a creamy risotto using shirataki rice by slowly incorporating homemade broth and stirring in some grated cheese until it melts into a delightful dish.
  3. Shirataki Sushi: Use shirataki rice to make low-carb sushi rolls. Fill with your preferred fish or vegetables, and wrap them in nori for a refreshing twist.

Pairing Shirataki Rice with Other Foods

Shirataki rice doesn’t just stand alone; it pairs wonderfully with many other food options. Here are some great combinations:

  • Protein Sources: Chicken, shrimp, tofu, and beef are all excellent partners for shirataki rice.
  • Sauces: Tasty sauces like teriyaki, oyster sauce, or even peanut sauce add depth and flavor to the dish.
  • Vegetables: Brighten your meal by adding sautéed or steamed vegetables, such as bok choy, carrots, or snow peas.

Creating a Balanced Meal with Shirataki Rice

Focus on balance when building your plate. Aim to include multiple food groups for a wholesome meal:

  • Lean Proteins: Pair shirataki rice with protein options, such as grilled chicken or scrambled tofu.
  • Healthy Fats: A drizzle of sesame oil or a few slices of avocado can complement the dish beautifully.
  • Colorful Vegetables: Incorporate an array of vegetables for added nutrients and vibrant visuals.
  • Flavor Profiles: Apply a mix of spices, oils, and sauces for a dynamic and enjoyable meal experience.

By diversifying your meal with varied ingredients, shirataki rice can easily fit into an array of different dishes.

Shirataki Rice vs Regular Rice: Key Differences

As we examine shirataki rice further, comparing it with traditional rice can be quite enlightening. The differences in calories, carbohydrates, and overall health benefits highlight the appeal of shirataki rice.

FeatureShirataki RiceRegular Rice
CaloriesMinimal (approx. 10-20)High (approx. 205)
CarbohydratesVery Low (approx. 1g)High (approx. 45g)
FiberHigh (approx. 3g)Very Low (approx. 1g)
TextureGelatinousFluffy
Preparation TimeQuick (10-15 minutes)Longer (30-45 minutes)
TasteMildRice flavors

The contrasts presented in the table emphasize the notable qualities that make shirataki rice a desirable option for various dietary needs. From caloric content to cooking time, shirataki rice certainly offers unique advantages for health-conscious individuals.

Is Shirataki Rice Keto-Friendly?

Yes, Shirataki rice is keto-friendly because it is extremely low in carbohydrates and calories. Made from konjac root, it consists mostly of glucomannan fiber, which has minimal impact on blood sugar levels and helps with digestion. Since it contains almost zero net carbs, it fits perfectly into a ketogenic diet, making it a great substitute for traditional rice while keeping you in ketosis.

Shirataki Rice FAQ

1. Is shirataki rice safe to eat?

Yes, shirataki rice is generally safe for consumption. However, like any food, individuals with sensitive digestive systems should experiment carefully. Starting with small portions may help mitigate any issues related to bloating or gas.

2. Can you eat shirataki rice raw?

While it’s technically possible to consume raw shirataki rice, it’s not the most enjoyable option. Cooking the rice significantly improves its texture and flavor, enhancing your dining experience.

3. How should shirataki rice be stored?

You can store uncooked shirataki rice in a cool, dry place. Once you’ve opened the package and cooked it, refrigerate any leftovers in an airtight container with a maximum lifespan of 3-4 days.

4. Can shirataki rice help with my dieting?

Absolutely! The low-calorie, high-fiber nature of shirataki rice makes it a fantastic option for those trying to lose weight. By swapping it in for traditional rice, you can enjoy a hearty meal without excessive caloric intake.

Conclusion

As we continue to explore dietary options that prioritize health and sustainability, shirataki rice emerges as a fierce competitor. Its low-calorie count, fiber content, and unique properties enable it to be incorporated into various cuisines. Whether you’re looking to lose weight, manage diabetes, or simply want a new culinary experience, shirataki rice promises to fit the bill.

As you try your hand at cooking with shirataki rice, keep experimenting with flavors and recipes. This innovative rice alternative has the potential to revolutionize your meals and help you achieve your dietary goals. Embrace this guilt-free option, and enjoy the journey toward healthier eating!

0 comments
0 FacebookTwitterPinterestEmail
CeraVe, Sun Bum, and Supergoop! sunscreens divided on beach background

As you plan your beach getaway in 2025, choosing the right sunscreen is crucial. Not only does it protect your skin from harmful UV rays, but it also helps maintain your skin’s health and appearance. With the right sunscreen, you can enjoy your time in the sun without worrying about sunburn or skin damage. We’ll be highlighting three must-have sunscreens that will keep you protected and feeling great during your beach adventures.

Top Picks

How We Chose These Sunscreens

When selecting the best sunscreens for your beach getaway, we considered factors such as SPF level, skin type compatibility, water resistance, and overall user satisfaction. Each of these products has been highly rated by users and offers unique benefits to cater to different needs.

1. CeraVe Hydrating Sheer Sunscreen SPF 30

CeraVe Hydrating Sheer Sunscreen alongside its original packaging boxCeraVe’s Hydrating Sheer Sunscreen is a game-changer for your beach days and everyday sun protection. This sunscreen combines both mineral and chemical filters, making it effective while also lightweight.

At first glance, the CeraVe Hydrating Sheer Sunscreen looks like a solid pick. It’s oil-free, non-comedogenic, and formulated with niacinamide, ceramides, and hyaluronic acid—all ingredients I love for keeping my skin balanced and hydrated. But here’s the real question: does it actually feel sheer?

I squeezed out a small amount, and right away, I noticed the creamy yet lightweight texture. It spread smoothly across my skin, and while it initially left a slight white cast, it faded within a couple of minutes. I wouldn’t call it completely invisible, but it’s definitely more blendable than most mineral sunscreens I’ve tried.

Whether you’re lounging on the beach or just running errands, this sunscreen is perfect for daily use. Plus, it absorbs quickly without leaving a greasy residue, so you can enjoy your time in the sun without worry.

Key Ingredients: More Than Just Sunscreen

What makes this sunscreen stand out is its skincare-first approach. It’s not just about sun protection—it’s also packed with ingredients that nourish and strengthen your skin.

  • Zinc Oxide (9%) – A mineral UV filter that physically blocks harmful UVA and UVB rays.
  • Ceramides – Essential for restoring the skin barrier and preventing moisture loss.
  • Niacinamide – Helps calm redness, controls oil, and strengthens the skin.
  • Hyaluronic Acid – Adds hydration to prevent dryness from sun exposure.

Together, these ingredients make it more than just a basic sunscreen—it’s a multi-tasking formula that protects, hydrates, and repairs all in one step.

Technical Details

  • Manufacturer: CeraVe
  • Item model number: S3864500
  • Product Dimensions: 5.72 x 6.4 x 14.94 cm; 85.05 g
  • ASIN: ‎B0BFJVZPDC

Additional Information

CeraVe sunscreen Amazon rating with 4.5 stars from 2,474 reviews

Application & Wear: Does It Live Up to the Hype?

CeraVe sunscreen placed on a beach towel with summer accessoriesUsing it daily is pretty straightforward:

  1. Apply a generous amount to your face and neck 15 minutes before sun exposure.
  2. Blend it in—it takes a minute to fully absorb.
  3. Reapply every two hours, especially if you’re sweating or spending time outdoors.

I tested this under makeup, and it worked surprisingly well. It didn’t pill or create a sticky layer, which is a huge win for a mineral sunscreen. My foundation sat smoothly on top, and I didn’t notice excessive shine throughout the day. However, if you have very oily skin, you might want to set it with powder to keep it from looking too dewy.

What People Say

Users rave about how lightweight and effective this sunscreen is, especially for those with darker skin tones who often struggle with white cast. Many appreciate its hydrating properties and the fact that it doesn’t feel heavy on the skin.

  • “I did research thoroughly for an affordable yet effective sunscreen. I know that zinc oxide and titanium are key ingredients to get the protection I needed, but was very concerned with the white cast. I’m Black and so black girl sunscreen 50 was my first and thought best pick as a hybrid but I’ve used it a couple months, and just couldn’t get over the lavender scent. I decided to do a little more research and came across this one, which is also a hybrid and a little more zinc oxide coverage. I’ve used it for a couple days now and my skin loves it! It rubs in well, no white cast, mild scent (preferred over lavender) and excellent coverage.” – Stacy
  • “I first learned about CeraVe from two different nurses when I was hospitalized some time ago and worried about how dry my skin had become. They each said it is the best product out there and they use it both as a face and as a body moisturizer. So when I saw this sunscreen I knew it would be a good product, and it is! The sunscreen lotion is not thick and goes on easily. It does take a minute to absorb, but it does and it is the first thing I put on my face in the morning, followed by a moisturizer. I trust any CeraVe product, and this one does not disappoint!” – Alice
  • “Every sunblock I have ever tried — chemical or mineral — has burned my skin. As a result, I have avoided spending time in the sun in the middle of the day. This sunscreen is entirely different. I’m not sure why, but it does not hurt my skin, at all. I can use it on the delicate skin on my face or I can use it on my body and it is effective and comfortable. It isn’t sticky or slimy and it doesn’t leave white streaks everywhere. I have finally found a sunscreen I can use!” – Amy S.

CeraVe Hydrating Sheer Sunscreen with SPF 30 under running water

Pros and Cons

Pros:

  • Absorbs quickly without leaving a greasy residue
  • Provides excellent hydration
  • Suitable for all skin types, including sensitive skin

Cons:

  • Some users noted it can make the skin appear shiny


Why You’ll Love It

  • Hydrating formula
  • Non-greasy finish
  • Suitable for sensitive skin

When to Use It

Perfect for beach days, outdoor activities, or even just a casual day out. It’s versatile enough to be used daily without feeling heavy or sticky.

Current Price: $14.99

Rating: 4.5 (Total: 2537+)

Buy Now button

2. Sun Bum Original SPF 50 Sunscreen Body Lotion

Sun Bum SPF 50 sunscreen bottle on a tropical beachSun Bum’s Original SPF 50 Sunscreen is your go-to for both everyday sun protection and those special beach days. This broad-spectrum moisturizing sunblock is infused with Vitamin E, making it not just a sunscreen but also a skin-loving lotion. It’s perfect for those long days under the sun, whether you’re lounging on the beach or enjoying a picnic in the park. Plus, it’s Hawaii 104 Act Compliant, meaning it’s reef safe and great for the environment.

It spreads effortlessly across the skin, absorbing quickly without leaving any sticky or oily residue. This was a pleasant surprise, as many sunscreens tend to feel heavy and greasy. The lotion also imparts a subtle, healthy-looking matte finish, giving the skin a slight glow that lasts throughout the day. You’ll love how easily it absorbs without leaving a greasy feel, so you can focus on having fun in the sun.

Key Ingredients: What’s Inside?

Close-up of Sun Bum sunscreen lotion with protection detailsOne thing to love about Sun Bum SPF 50 is that it’s not just a sunscreen—it’s also packed with hydrating and skin-soothing ingredients.

  • Avobenzone, Homosalate, Octisalate, and Octocrylene – These provide broad-spectrum UVA/UVB protection, shielding the skin from harmful sun rays.
  • Vitamin E – A powerful antioxidant that helps neutralize free radicals caused by sun exposure.
  • Aloe Vera – Known for its hydrating and soothing properties, making it perfect for sensitive skin.
  • Paraben-Free & Reef-Friendly – It’s free from oxybenzone and octinoxate, making it safe for both your skin and the ocean.

These ingredients make Sun Bum a solid choice for people who want sun protection without compromising skin hydration.

Technical Details

  • Manufacturer: Sun Bum
  • Department: Summer Accessories
  • Item model number: ‎20-40050
  • Product Dimensions: 10.16 x 15.24 x 5.08 cm; 272.16 g
  • ASIN: B004XGPM32

Additional Information

Amazon customer reviews and rankings for Sun Bum sunscreen

How to Use Sun Bum Original SPF 50 Sunscreen

Woman applying Sun Bum sunscreen on a man's shoulderUsing sunscreen properly is just as important as picking the right one. Here’s how I apply Sun Bum for maximum protection:

  1. Apply a generous amount 15 minutes before sun exposure.
  2. Reapply every two hours, especially if you’re swimming or sweating.
  3. Use it daily as the last step in your skincare routine for consistent sun protection.

It’s water-resistant for up to 80 minutes, making it great for beach days and workouts.

What People Say

Users appreciate the pleasant scent and effective sun protection, especially for long days at the beach. Many have noted that it doesn’t leave a greasy residue, making it comfortable to wear throughout the day.

  • “Last time we took a cruise through the Caribbean, we burnt that first time we laid out in the sun. This time around, I read reviews, but was also looking for a sunscreen that was approved for certain places in the Caribbean due to the ingredients. I saw Sun Bum recommended by a cruiser on our Facebook group, so we purchased to give it a try. We are not sun worshippers, so we only needed a sunscreen that could keep us from burning in about 1-1.5 hours of sun time. This was fantastic for that without having to reapply! Also, the smell was great. I don’t love many sunscreen smells out there, but this was definitely pleasant.” – C.J.S.
  • “We bought this to take on our trip to Jamaica. I heard the sunscreen at the resort was $50, so we stocked up beforehand. We still didn’t bring enough (we were there over a week). This sunscreen is moisturizing, waterproof, and we never burned. Definitely will buy this again.” – Lani Wilson
  • “The product works great. We had zero issues with it running into the eyes and burning as long as you let it soak in for 10-15 minutes before getting it wet. One of my kids said it burned his eyes, but that was after he went straight into the water.” – Amazon Customer

Sun Bum sunscreen bottle on sandy beach with surfer nearbyPros and Cons

Pros:

  • Non-greasy feel and absorbs quickly
  • Effective sun protection without frequent reapplication
  • Pleasant scent that many users enjoy

Cons:

  • Some users mentioned it can burn if it gets into the eyes


Why You’ll Love It

  • Broad-spectrum protection
  • Moisturizing formula with Vitamin E
  • Reef safe and compliant with Hawaii regulations

When to Use It

Ideal for beach outings, pool days, or any outdoor activities where sun exposure is a concern. It’s versatile enough to be used daily, ensuring your skin stays protected without feeling weighed down.

Current Price: $18.28

Rating: 4.7 (Total: 14578+)

Buy Now button

3. Supergoop! Unseen Sunscreen SPF 50

Supergoop! Unseen Sunscreen SPF 50 bottle with beach backgroundSupergoop! Unseen Sunscreen SPF 50 is your ultimate companion for sun protection, whether you’re hitting the beach or just enjoying a sunny day out. This weightless, scentless sunscreen offers broad-spectrum protection while feeling like a second skin. It’s perfect for all skin types and is water and sweat resistant, making it ideal for those active beach days. Plus, it doubles as a moisturizer, so your skin stays hydrated and protected without any greasy residue. You’ll appreciate how effortlessly it glides on, leaving no white cast behind.

Applying it was a breeze; it glided effortlessly over my skin, leaving behind no white cast—a significant plus for those with medium to deep skin tones. The finish was velvety and matte, making my skin feel smooth without any greasy residue.

Key Ingredients: What’s Inside?

Sunscreen tube with key ingredients for skin hydration benefitsSupergoop! has formulated this sunscreen with a blend of chemical UV filters to ensure broad-spectrum protection:

  • Avobenzone (3%): Provides protection against UVA rays.
  • Homosalate (8%): Protects against UVB rays.
  • Octisalate (5%): Stabilizes avobenzone and adds UVB protection.
  • Octocrylene (4%): Offers both UVA and UVB protection and enhances water resistance.

Additionally, the inclusion of Meadowfoam Seed Oil aids in hydration, while Frankincense contributes to skin soothing properties.

What People Say

Users rave about the invisible finish and how it feels like nothing on the skin. Many appreciate that it doesn’t leave a greasy residue, making it comfortable for all-day wear, even during outdoor activities.

  • “This is my favorite sunscreen. Easy to apply and it feels good. Not sticky at all. In fact, it works as a perfect base for makeup if you wear makeup. Otherwise it is fine to wear on its own. Depending on how long or how much I will be outside, I apply once in morning and once after lunch. If you will be driving for a long period of time and the sun hits you while driving, don’t forget to put some on your ears. Also the backs of your hands. I always make sure that I have at least two tubes of this on hand.” – Holly Markt
  • “I apply this sunscreen to my face every day. It is not at all drying and is colorless. After letting it sit for a few minutes I apply moisturizer and make up. I don’t know what I would do if this was every disocntinued.” – Dawn
  • “I do love this product so much because it has no white cast and it kind of works as a primer. It looks great on my face. I do have sensitive skin so I do break out a little if I keep it on for a long time, when I’m out in the heat.” – Rachel Collins

Supergoop! sunscreen benefits with improved protection and clarityTechnical Details

  • Product Dimensions ‏ : ‎ 5.04 x 0.74 x 2.13 inches; 1.92 ounces
  • UPC ‏ : ‎ 816218028817
  • Manufacturer ‏ : ‎ Supergoop!
  • ASIN ‏ : ‎ B0DPNL864S
  • Country of Origin ‏ : ‎ USA

Additional Information

Supergoop! Unseen Sunscreen Amazon ratings and best-seller ranking overview

Usage Experience: Daily Wear and Makeup Compatibility

Incorporating this sunscreen into my morning routine was seamless. I applied a generous amount to my face after moisturizing, and it absorbed quickly without any pilling. One of the standout features is its ability to double as a makeup primer. My foundation applied smoothly over it, and throughout the day, I noticed a reduction in shine, which is a boon for those with combination or oily skin.

Clear sunscreen gel with no white cast and lightweight feelPros and Cons

Pros:

  • Lightweight and non-greasy
  • Effective sun protection without a white cast
  • Hydrating formula that feels great on the skin

Cons:

  • Some find it a bit pricey compared to other sunscreens


Why You’ll Love It

  • Invisible, weightless formula
  • Broad-spectrum SPF 40 protection
  • Water and sweat resistant

When to Use It

Perfect for beach days, pool parties, or any outdoor adventures where sun exposure is a concern. It’s also great for daily use, ensuring your skin stays protected without feeling heavy.

Current Price: $38.00

Rating: 4.6 (Total: 16525+)

Buy Now button

Frequently Asked Questions

What should I look for when choosing a sunscreen for my beach getaway?

When selecting a sunscreen, you want to consider a few key factors. First, look for a broad-spectrum sunscreen that protects against both UVA and UVB rays. An SPF of at least 30 is recommended for adequate protection, especially if you plan to spend extended time in the sun. Also, consider your skin type; if you have sensitive or acne-prone skin, opt for non-comedogenic and fragrance-free options. Ingredients matter too—mineral sunscreens with zinc oxide or titanium dioxide are great for sensitive skin, while chemical sunscreens can offer a lighter feel. Lastly, think about water resistance, especially if you’ll be swimming or sweating; look for products labeled as water-resistant for up to 80 minutes.

How often should I reapply sunscreen while at the beach?

You should reapply sunscreen every two hours, or immediately after swimming, sweating, or towel drying. Even if you’re using a water-resistant formula, it’s essential to stick to this routine to ensure you’re protected throughout the day. If you’re using a spray sunscreen, make sure to apply it generously and rub it in for even coverage. For convenience, consider setting a timer on your phone or using a waterproof watch to remind you when it’s time to reapply. Remember, even on cloudy days, UV rays can penetrate through the clouds, so don’t skip the sunscreen!

Can I use sunscreen under my makeup, and if so, how?

Absolutely, you can use sunscreen under your makeup! In fact, it’s a great way to ensure you’re protected while looking your best. For a smooth application, choose a lightweight, non-greasy sunscreen like Supergoop! Unseen Sunscreen, which acts as a primer and won’t interfere with your makeup. Apply your sunscreen first, allowing it to absorb for a few minutes before applying foundation or other makeup products. If you’re worried about shine or greasiness, you can use a translucent powder or setting spray to help keep your makeup in place and reduce shine throughout the day. Just remember to reapply sunscreen every two hours, which can be tricky with makeup, so consider using a powder sunscreen or a setting spray with SPF for easy touch-ups.

Is there a difference between face sunscreen and body sunscreen?

Yes, there is a difference! Face sunscreens are typically formulated to be lighter, less greasy, and non-comedogenic, meaning they won’t clog pores or trigger breakouts. Many also contain added skincare benefits like antioxidants, hydration, or a matte finish to control oil. Body sunscreens, on the other hand, are often thicker and may contain more moisturizing ingredients since the skin on the body tends to be less sensitive than the face. While you can use body sunscreen on your face in a pinch, it’s best to stick to a facial sunscreen to avoid irritation or breakouts.

Can I tan while wearing sunscreen?

Yes, you can still tan while wearing sunscreen, but it will help prevent the deeper skin damage caused by UV rays. Sunscreen protects against burns and reduces the risk of premature aging and skin cancer, but it doesn’t block 100% of UV radiation—especially if you’re using an SPF lower than 50. If you want a sun-kissed glow without the risks of UV exposure, consider using a self-tanner or bronzing lotion instead. And remember, even if you don’t burn, sun exposure still contributes to long-term skin damage, so it’s always best to stay protected!

Wrapping Up

Choosing the right sunscreen is essential for enjoying your beach getaway while protecting your skin. The CeraVe Hydrating Sheer Sunscreen offers a great balance of hydration and protection, making it ideal for daily use. If you’re looking for something that provides higher SPF and a pleasant scent, the Sun Bum Original SPF 50 is a fantastic choice. For those with sensitive skin, the Supergoop! Unseen Sunscreen is lightweight and effective. By selecting one of these top-rated sunscreens, you can ensure that your skin stays safe and healthy while you soak up the sun.

CeraVe Hydrating Sheer Sunscreen SPF 30Sun Bum Original SPF 50 SunscreenSupergoop! Unseen Sunscreen Body SPF 40
Product Image
Product Image
Product Image
Rating4.5/5 (1000+ reviews)4.7/5 (1000+ reviews)4.7/5 (1000+ reviews)
HighlightsHybrid formula with Zinc Oxide, Hyaluronic Acid, and Niacinamide. Water-resistant for up to 80 minutes.Broad spectrum protection with Vitamin E, Hawaii 104 Act compliant, moisturizing.Invisible, weightless formula, water and sweat resistant, suitable for all skin types.
ProsNon-comedogenic, lightweight, no white cast, suitable for sensitive skin.Pleasant scent, non-greasy, effective for long sun exposure.Silky texture, great for sensitive skin, excellent under makeup.
ConsMay feel slightly greasy for some users.Can burn eyes if it runs; may require reapplication after swimming.Higher price point, can be difficult to remove.
Price$14.99$18.28$42.16
Buy Now buttonBuy Now buttonBuy Now button
0 comments
0 FacebookTwitterPinterestEmail
Paula's Choice 2% BHA Liquid Exfoliant bottle displayed against a blurred background

I’ve tried countless exfoliants over the years, but Paula’s Choice Skin Perfecting 2% BHA Liquid Exfoliant is on a different level. If you’re battling clogged pores, blackheads, or uneven texture, this product might be the solution you’ve been searching for. Its formula combines simplicity and effectiveness to deliver results without irritating your skin.

First Impressions

Before and after comparison of skin improvement using Paula's Choice exfoliantUnboxing Paula’s Choice 2% BHA Exfoliant felt promising. The sleek, minimalistic packaging screams “professional-grade,” and the product’s liquid consistency is surprisingly lightweight. Unlike some exfoliants that come with a strong chemical odor, this one has a faint, almost unnoticeable scent.

After applying a few drops to a cotton pad and sweeping it across my face, I noticed how quickly it absorbed. My skin didn’t feel sticky, just smooth and slightly hydrated. No immediate tingling or redness—a relief for anyone with sensitive skin like me.

Why It Works: Key Ingredients

The magic lies in the carefully curated formula. Each ingredient plays a role in transforming your skin:

Salicylic Acid (2%)Unclogs pores, reduces blackheads, and prevents acne.
Green Tea ExtractSoothes irritation and provides antioxidant protection.
MethylpropanediolEnhances absorption and hydrates the skin.

Technical Details

  • Brand: Paula’s Choice
  • Format: Liquid
  • Volume: 4 oz (118 mL)
  • Skin Type: All (including sensitive)
  • Key Ingredients: Salicylic Acid (2%), Green Tea Extract
  • Fragrance-Free: Yes
  • Packaging: Recyclable bottle
  • Cruelty-Free: Yes
  • Allergens: Free from parabens, sulfates, and synthetic fragrances

How to Use It for Maximum Effect

Consistency is key when it comes to this exfoliant. Here’s how I incorporate it into my routine:

  • At Night: After cleansing, I apply a small amount to a cotton pad and gently sweep it across my face and neck.
  • Follow-Up: I let it fully absorb before layering a moisturizer or hydrating serum.
  • Pro Tip: Use sunscreen during the day—this product makes your skin more sensitive to the sun.

My Results After Two Weeks

Demonstration of applying Paula's Choice exfoliant with a cotton pad

After just a week, my skin felt smoother. By the end of week two, here’s what I noticed:

  • Reduced Blackheads: My nose and chin, notorious for clogged pores, looked visibly clearer.
  • Even Skin Tone: Post-acne marks started fading, leaving a more uniform complexion.
  • Smoother Texture: Dry patches disappeared, making makeup application a breeze.

What Others Are Saying

How did I live without this!

“I have sensitive skin and am prone to breakouts. I recently had a bad reaction to something right before Thanksgiving and had cysts like pimples and raw skin all along my jawline and cheeks. It took me about a month to try and get my skin back to normal. I decided to give this product a try and bought the small bottle. Within three days, my skin is going back to normal and even feels so smooth! I used to use Maybelline Baby Skin primer prior to my foundation. This makes my face feel and look amazing. Needless to say this will now be forever in my skin routine and I will be buying the larger bottle from now on.” -Alisa

If you want clear skin – buy this!

“I’ve been using Paula’s Choice Skin Perfecting 2% BHA Liquid Exfoliant for a few months now, and I’m absolutely in love with it. This product is a game-changer for my skincare routine. The salicylic acid gently exfoliates my skin, unclogging pores and helping to clear up breakouts without causing irritation. My skin feels smoother, and I’ve noticed a significant reduction in blackheads and enlarged pores. It’s lightweight and absorbs quickly, and I love that it’s alcohol-free and gentle enough for daily use. A little goes a long way, so the bottle lasts quite a while. Overall, it’s a must-have for anyone looking to improve their skin texture and tackle acne or congestion. Highly recommended!” -Kateryna

Get some of this!!! I’m a snobby high priced skincare junkie and was hesitant to purchase

Ingredients in Paula's Choice exfoliant, highlighting salicylic acid and green tea extract

“I will preface this with I have excellent skin, especially for my age (44). I have been obsessed with high end skincare since I was in my 20s. I refuse to get Botox or fillers for now…so I’m always looking for new stuff and previous tried drink elephants baby facial. I loved it but I need a more affordable product right now and took a chance on this. Holy hell 10/10! I definitely have used strong products for a long time but even so I can only use this every other day. Let it dry then add moisturizer. At night I’ll add petroleum jelly on top of moisturizer for extra hydration. I would say only use once a week to start. Love how my skin looks and how makeup glides on. What a shock at how affordable it is!” -Bethany

Incredible for tiny bumps and oil!!

“I have very oily skin especially on my T zone and after a month of using this 2 times a week I noticed a HUGE DIFFERENCE! My pores look smaller and those tiny little forehead bumps I’ve always struggled with are GONE!! They were gonna after only 1-2 uses! Magic in a bottle.” -Katelynn Albanese

Excellent product

“I’ve had a few blemishes on my nose and face that never seem to go away, after using this for only a few days they are nearly gone. Will definitely be keeping this in the routine” – Ian

Paula's Choice exfoliant benefits including reduced pores, oil control, and skin barrier improvement

Is It Worth Buying?

If you’re looking for an effective, easy-to-use exfoliant that delivers visible results, Paula’s Choice Skin Perfecting 2% BHA Liquid Exfoliant is worth every cent. It’s ideal for anyone dealing with:

  • Blackheads or clogged pores
  • Uneven skin texture
  • Mild acne or post-inflammatory hyperpigmentation

With its affordable price and proven efficacy, this product is a must-have addition to any skincare routine.

FAQs

Q: Can I use it every day?
A: Start slow—2-3 times a week—and build up as your skin adjusts.

Q: Is it suitable for sensitive skin?
A: Yes! The formula is gentle but effective, though patch-testing is always a good idea.

Q: Does it work for all skin types?
A: Absolutely! Whether you’re oily, dry, or combination, this exfoliant adapts well.

Q: How long before I see results?
A: Some notice smoother skin within a week, but significant improvements appear after 2-4 weeks of consistent use.

Paula’s Choice Skin Perfecting 2% BHA Liquid Exfoliant lives up to the hype. It’s not just skincare; it’s self-care in a bottle. Ready for your best skin yet? Give it a try and watch the transformation unfold.

0 comments
0 FacebookTwitterPinterestEmail
A Naturelo Raw Greens Whole Food Powder container with a mixed berry flavor, surrounded by a colorful assortment of fresh fruits and vegetables, emphasizing natural ingredients.

I’ve tried a lot of superfood powders over the years, and I have to say, NATURELO Raw Greens Superfood stands out. If you’re like me and struggle to get enough greens in your diet, this is a game-changer. It’s packed with organic whole foods, loaded with nutrients, probiotics, and digestive enzymes, and best of all—it actually tastes decent (which is rare for a greens powder).

First Impressions

When I first got my hands on NATURELO Raw Greens Superfood, I was skeptical. I’ve had my fair share of chalky, grassy-tasting powders that are nearly impossible to drink without gagging. But after mixing a scoop into some cold water, I was surprised. The taste? Earthy, slightly sweet, and not overpowering. It blended smoothly, especially in a smoothie, and didn’t have that gritty texture I’ve experienced with other brands.

The first thing I noticed after using it for a few days? More energy. I usually hit an afternoon slump, but after adding this to my morning routine, I felt less sluggish and more focused. Plus, my digestion seemed better—probably thanks to the probiotics and digestive enzymes packed into this formula.

What’s Inside? The Ingredients That Make It Worth It

A fit woman in black activewear performing a bicep curl with a dumbbell while sitting on a bench in a well-lit modern gym

One of the biggest reasons I chose NATURELO Raw Greens Superfood was its clean ingredient list. No artificial junk, no weird fillers—just real, nutrient-rich foods.

1. Green Superfoods (The Heavy Hitters)

  • Spirulina & Chlorella – Great for detox and boosting immunity
  • Wheatgrass & Barley Grass – Packed with chlorophyll and essential minerals
  • Kale & Spinach – Loaded with vitamins A, C, and K for overall health
  • Broccoli & Alfalfa – Full of fiber and antioxidants

2. Antioxidant-Rich Fruits

  • Acai Berries – High in anthocyanins for skin and immune support
  • Blueberries – Packed with vitamin C and brain-boosting antioxidants
  • Goji Berries – Great for vision and overall wellness

3. Gut Health Support

  • Probiotics – Help with digestion and gut balance
  • Digestive Enzymes – Aid in nutrient absorption and reduce bloating

Everything in this blend is organic, non-GMO, and third-party tested for purity. It’s refreshing to see a brand that actually cares about quality.

A close-up of NATURELO Raw Greens Whole Food Powder container showing the product label and supplement facts.Technical Details

  • Brand: NATURELO
  • Format: Powder
  • Weight: 240g
  • Additives: All Natural, Gluten-Free, Clean Label, No GMOs
  • Item Model Number: GREENS-WB-30
  • Allergen Information: Gelatin-Free
  • Age Range: Over 18s
  • Product Dimensions: 9.2 x 9.4 x 11 cm
  • Manufacturer: NATURELO

Additional Information

How to Take It (And What Works Best)

If you’re new to superfood powders, NATURELO Raw Greens Superfood is super easy to use.  Just mix one scoop with about 8-12 ounces of cold water, juice, milk, or even a smoothie for a boost of energy.

MethodDescription
Straight Up with WaterSimple and effective. I just mix one scoop into a cold glass of water.
Blended into a SmoothieMy go-to. It adds a nice boost without messing with the flavor.
Mixed with JuiceA great option if you want a sweeter taste.
Stirred into Yogurt or OatmealSurprisingly good if you want to mix up your routine.

For best results, take it in the morning. It gives you an energy boost to start your day and helps with digestion before you eat heavier meals.

Does It Work? My Results After Using It

I’ve been using NATURELO Raw Greens Superfood for a few weeks now, and here’s what I’ve noticed:

  • More Energy – No more mid-day crashes. I feel more alert and focused.
  • Better Digestion – Less bloating, better gut health.
  • Stronger Immune System – I usually catch every cold going around, but I’ve been feeling great.
  • Healthier Skin – Maybe it’s the antioxidants, but my skin looks clearer and more vibrant.

The Role of Dietary Supplements in Health

1. Bridging Nutritional Gaps

A cheerful woman in a kitchen enjoying a green smoothie, with fresh fruits and a blender on the counterMost people find it difficult to get every essential nutrient from diet alone. That’s where dietary supplements fill in the gaps and provide key vitamins and minerals necessary for optimal health.

A well-formulated multivitamin should offer over 20 essential nutrients, including vitamin D3, which many people lack due to reduced sun exposure. Supplements help ensure the body gets what it needs, even when diet alone falls short.

2. Supporting Physical Health

Essential nutrients like vitamin D, magnesium, and K2 are crucial for calcium absorption, ensuring it strengthens bones rather than accumulating in the arteries.

For women, B-complex vitamins support hormonal balance and reproductive health, making them an excellent addition to a wellness routine.

3. Enhancing Mental Well-Being

B vitamins also play a role in brain and nerve function, helping the body manage stress and stay mentally sharp. With today’s fast-paced world, maintaining mental clarity and reducing fatigue is essential.

Why Supplements Like This Matter

Most of us don’t get enough nutrients from food alone. Even with a healthy diet, it’s hard to hit all the recommended daily values of essential vitamins and minerals. That’s where supplements come in—they help fill in the gaps and make sure your body gets what it needs.

Key Nutrients That Matter:

Vitamin D3, Magnesium, and K2Support bone health and keep calcium where it belongs (in your bones, not your arteries).
B VitaminsEssential for energy, metabolism, and brain function.
AntioxidantsHelp fight free radicals and keep your body running smoothly.

A lot of cheap supplements use synthetic ingredients, but NATURELO sticks to plant-based, natural sources, which means better absorption and fewer side effects.

Reviews: What Are People Saying?

A promotional image for a green superfood powder, featuring a woman pouring a green smoothie and highlighting health benefits with the slogan 'Drink Your Veggies'

Great taste, energizing, a little hard to mix

“I was quite surprise at the pleasant flavor of the greens superfoods. I have some in the morning to start the day. I can tell I am more energized and focused when using this product. The ingredients are good for you and it helps me get in my missing servicing’s of veggies. I normally just put it in a glass and stir, would probably do better in a mixing cup. It does OK just stirring but some residue in my cup bottom and on the sides. I ordered the larger container the second time I ordered because now my husband is hooked on the product as well. I just set up as a subscription which helps to defray the costs.” -Debbie Sunshine

Taste and texture

“This is a great product for me, it leaves no Aftertaste its not gritty and it has a nice clean flavor. I bought the unfavorable one because I wanted to see if it didn’t leave a nasty taste in my mouth and it didn’t. Love it and will most definitely purchase again! 🖖” –liz

Great Greens superfood

A promotional image for NATURELO Raw Greens Whole Food Powder featuring a green, nature-inspired background.“I have been using Dr. Gundry Primal Greens but they haven’t had it in stock so I was looking for a replacement and settled on this. I watched a couple of reviews on this product and decided to give it a go. I add this to my morning drink concoction that has a variety of powders and the flavor of this works great with everything else. It’s got a very subtle sweetness which is nice and helps to offset the sour Vitamin C mix that I also mix in. Some reviewers say it doesn’t mix well but I had no issues….however, I put it in a shaker bottle and shake it up well. I also drink it fairly quickly and keep the cup moving as I drink it. Nothing was left on the bottom and I never swallowed any clumps. I’d recommend this product, it’s definitely one of the better tasting greens mixes I’ve had.” -Sonja

All the nutrients you’ll need in one glass!

“I absolutely love this product it’s packed with vitamins, minerals, probiotics all in one! I love it in my morning smoothie which I add my vital protein collagen powder, raw greens powder, slice of my favorite fruit or veggie and water if I want a veggie smoothie or plant based Ripple pea milk when I want a creamy fruity smoothie ( or any milk of your choice). The flavor on its own is delicious and mild, I was pleasantly surprised and it’s not chunky or powdery tasting literally smooth and easy to mix.” -Laura King

Watch out. Mixed berry flavor – not sweet, wild berry flavor – sweet

“Continuous product improvements seem to change if the taste is sweeter, like the wild berry flavor (with a flower in the picture) which I loved, or with the recent version mixed berry flavor (with apple in picture) it is not sweet, tastes like how it looks. The ingredients are bit different, the taste changes thru the versions. Yet a great product.” -Sandor Revay

Final Verdict: Is It Worth Buying?

After using NATURELO Raw Greens Superfood, I can confidently say—it’s worth it. It checks all the boxes:

Organic, high-quality ingredients
No artificial junk or fillers
Packed with essential nutrients
Supports digestion and gut health
Boosts energy without caffeine
Easy to mix and drink

If you’re looking for an easy way to get more greens into your diet and feel healthier overall, this is one of the best options out there. I’m definitely keeping it in my routine.

FAQs: Everything You Need to Know

A fit woman in athletic wear sipping a green juice through a straw, standing by a bright window

Q: What is NATURELO Raw Greens Superfood?

A: It’s an organic superfood powder packed with greens, fruits, probiotics, and digestive enzymes to help boost energy, digestion, and overall health.

Q: Does it taste good?

A: It’s better than most greens powders. Slightly earthy with a mild sweetness. Works best in smoothies or mixed with juice.

Q: Can I take it every day?

A: Yes! It’s designed for daily use and works best when taken consistently.

Q: Are there any side effects?

A: Not really—just stick to the recommended dosage. If you have a sensitive stomach, start with half a scoop and work your way up.

Q: Who should use this?

A: Anyone looking to improve their nutrition. It’s great for busy people, vegetarians, and anyone who struggles to eat enough greens.

Q: How should I take it?

A: Mix one scoop with water, juice, or a smoothie. Take it in the morning for the best results.

0 comments
0 FacebookTwitterPinterestEmail
A tall glass filled with a creamy avocado smoothie, placed on a rustic wooden table with fresh avocados and a spoon beside it

Explore Avocado Milk, a creamy and healthy choice. It’s made from ripe avocados mixed with water. This plant-based milk is perfect for those looking for a nutritious option.

Avocado Milk is great for cooking and is loved by health enthusiasts. We’ll look at its benefits, uses, and easy recipes. You’ll see why it’s becoming a top pick for many.

What Is Avocado Milk?

Avocado milk is a plant-based milk alternative made by blending ripe avocados with water. It often includes sweeteners or flavors. This milk has a creamy texture and a subtle flavor, just like the fruit.

It’s popular among vegans, those who can’t digest lactose, and anyone looking for a healthier dairy substitute. Unlike regular dairy milk, avocado milk is packed with nutrients and healthy fats. It’s a great choice for many diets.

Health Benefits

Avocado milk is a nutritious choice with many health perks. It’s full of vitamins and minerals that help keep you healthy. It has vitamin K, vitamin E, potassium, and healthy fats, all of which are good for you.

Rich in Nutrients

Avocado milk is packed with nutrients. These help your heart and improve how your body absorbs nutrients. The healthy fats in it also help you feel full, which is good for your weight.

It’s also great for your skin. Adding it to your diet can make a big difference in how you look and feel.

A Dairy-Free Option

Avocado milk is a great choice for those who can’t have dairy. It’s easy to digest and doesn’t have common allergens found in dairy. This makes it a tasty and safe option for many people.

How to Make Avocado Milk at Home

A glass of green avocado smoothie with whole and sliced avocados on a wooden countertop in a cozy kitchen ambianceMaking homemade avocado milk is easy. You need just a few things. Start with one ripe avocado and blend it with two cups of water in a blender. Blend until it’s smooth.

To make it taste better, add vanilla extract, honey or agave syrup, and a pinch of salt. These ingredients enhance the flavor.

Then, strain the mix through a nut milk bag or a fine mesh strainer. This step removes pulp and makes it creamy. Your avocado milk is now ready to be stored in the fridge. It keeps for up to a week.

This recipe lets you adjust flavors to your liking. You can avoid additives and preservatives. Making avocado milk at home means you get a healthy drink that fits your diet perfectly.

Culinary Uses of Avocado Milk

Avocado milk is great for many dishes and drinks. It’s creamy and full of nutrients, making it a key ingredient in the kitchen. It’s perfect for smoothies or as a tasty coffee creamer.

In Smoothies and Shakes

Avocado milk makes smoothies and shakes better. It’s often mixed with fruits like bananas and berries. This creates a healthy snack or meal.

It adds richness and a smooth feel to drinks. This makes every sip enjoyable and nutritious.

As a Coffee Creamer

Coffee fans will love avocado milk as a creamer. It’s creamy and adds a unique taste to coffee. Just swap your usual cream for avocado milk.

This makes your morning coffee healthier. It adds good fats to your drink.

Comparing Avocado Milk to Other Dairy Alternatives

A close-up of a glass of avocado smoothie surrounded by whole and halved avocados, with a blurred background of a kitchen
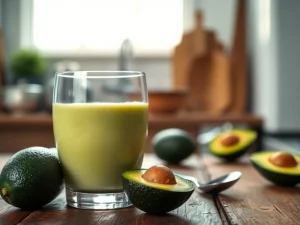
Exploring different dairy alternatives shows each one’s unique qualities. Let’s see how avocado milk compares to almond milk and oat milk.

Almond Milk vs. Avocado Milk

Almond milk is loved for its light texture and nutty taste. It has fewer calories and fats than avocado milk. Many brands add vitamins and minerals to almond milk.

Avocado milk, on the other hand, is packed with healthy fats and vitamins. It’s a more nutritious choice than almond milk.

Oat Milk vs. Avocado Milk

Oat milk is creamy and sweet, making it a hit with many. But, it might have added sugars and preservatives. Avocado milk has a smooth texture and lots of healthy fats.

This makes avocado milk a better choice than oat milk. Avocado milk’s unique flavor can also make dishes better than oat milk.

Storing and Keeping Avocado Milk Fresh

To enjoy your homemade avocado milk, it’s key to know how to store it right. Use an airtight container to keep it fresh. Store it in the fridge for 5 to 7 days. If it separates, just shake or stir it well before using.

Freezing avocado milk can also extend its life. Freeze it in ice cube trays for later use in smoothies or cooking. This way, you can enjoy its creamy taste whenever you want.

Conclusion

A smiling woman in a green sweater holding a glass of avocado smoothie, with fresh avocados and a spoon on the wooden table
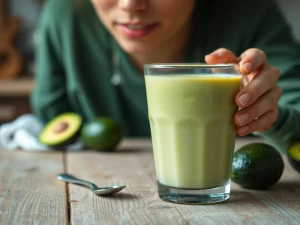
Avocado milk is a creamy and nutritious choice compared to regular dairy. It has a unique taste and many health benefits. This makes it a great addition to any diet.

It’s perfect for smoothies or coffee creamers, adding flavor and nutrition to meals. This dairy alternative is good for your health and well-being.

Choosing avocado milk means you’re choosing a diet full of important nutrients. It’s a great option for those looking for healthier choices. Its versatility and taste make it appealing to many.

When you start using avocado milk, you’ll find many ways to enjoy it. It’s not just tasty but also good for your health. So, give it a try and see how it can make your meals better.

FAQ

What is Avocado Milk?

Avocado Milk is a plant-based milk made by blending ripe avocados with water. You can add sweeteners or flavors if you like. It’s creamy and packed with nutrients, making it a great dairy alternative.

What are the health benefits of Avocado Milk?

Avocado Milk is full of vitamins like K and E, and potassium. It has healthy fats that are good for your heart and skin. It’s a nutritious choice for those who care about their health.

How can I make Avocado Milk at home?

To make Avocado Milk at home, blend one ripe avocado with 2 cups of water until smooth. You can add vanilla and sweetener for flavor. Strain it for a smoother texture and keep it in the fridge for up to a week.

What culinary uses does Avocado Milk have?

Avocado Milk is great for adding creaminess to smoothies and shakes. It’s also a healthy coffee creamer. It makes your drinks and recipes taste better and be more nutritious.

How does Avocado Milk compare to other dairy alternatives like Almond Milk or Oat Milk?

Avocado Milk has more nutrients and healthy fats than almond and oat milk. Almond milk is lower in calories but not as rich. Oat milk might have added sugars. Avocado milk’s unique flavor and texture make it stand out in recipes.

How should I store Avocado Milk to keep it fresh?

Store homemade Avocado Milk in an airtight container in the fridge for 5 to 7 days. If it separates, just shake it. You can also freeze it in ice cube trays for later use in smoothies or cooking.

0 comments
0 FacebookTwitterPinterestEmail
A close-up of a healthy chicken salad wrap served on a red plate with colorful tortilla chips on the side, placed on a wooden table.

Salad wraps are a tasty and healthy alternative to traditional meals. They bring together fresh greens, colorful veggies, and flavorful dressings in a convenient package. This makes them perfect for lunch, dinner, or even a snack.

Choosing the right ingredients can turn a simple wrap into a nutrient-packed meal. By selecting whole-grain tortillas and fresh produce, anyone can enjoy a delicious and balanced wrap. The endless combinations of ingredients ensure there’s something for every taste and dietary need.

These wraps are also perfect for those who want meals ready to go. Meal prepping salad wraps saves time and helps stick to healthy eating habits. Salad wraps offer a satisfying and tasty way to enjoy healthy eating.

Key Takeaways

  • Choose fresh and whole-grain ingredients for healthy wraps.
  • Meal prepping wraps can save time and maintain a healthy diet.
  • Salad wraps are versatile for any mealtime.

Choosing the Right Ingredients for Your Wraps

A variety of vibrant salad bowls, fresh vegetables, and healthy snacks displayed on a white wooden table, emphasizing nutritious meal options.To create a delicious and healthy salad wrap, it is essential to carefully select fresh ingredients. Focus on a combination of crisp vegetables, lean proteins, whole-grain or gluten-free wraps, and healthy fats. These elements will ensure your wrap is both full of flavor and nutritious.

Selecting Fresh Veggies and Leafy Greens

Include fresh veggies like bell peppers, cucumbers, and carrots to add crunch and nutrition. Lettuce wraps offer a low-carb alternative, with varieties such as iceberg and romaine adding crisp texture. Spinach leaves bring iron and other nutrients, while kale provides a hearty base. Combining different colors and types enhances both flavor and nutritional value, ensuring no two wraps taste the same.

Opting for Lean Proteins

Lean meats such as grilled chicken or salmon are excellent protein sources. A chicken avocado wrap combines the benefits of chicken salad with creamy avocado, making it both satisfying and rich in healthy fats. Black beans are a great vegetarian option and add protein and fiber. These proteins not only keep you full but also support muscle growth and repair.

Whole-Grain and Gluten-Free Options for Wraps

Choose whole-grain wraps for added fiber and nutrients. Whole-wheat tortillas and spinach wraps are nutritious choices. For those with gluten sensitivity, gluten-free wraps like rice or corn tortillas provide tasty alternatives. Tortilla wraps recipes can be adapted to suit these dietary needs, making a wholesome base that complements a variety of fillings.

Healthy Fats and Flavor Boosters

Boost flavor with healthy fats such as avocados, nuts, or seeds. Olive oil or hummus can be used as spreads to moisturize the wrap and improve taste. Herbs like cilantro or basil add freshness, while spices like cumin or paprika enhance flavor. These additions ensure that every bite is both exciting and nourishing, without unnecessary calories.

Wrap Recipes for Every Meal

A food vendor serving freshly prepared salad dishes with colorful shredded vegetables at an outdoor market.For any time of day, salad wraps offer a flexible and delightful meal option. From breakfast burritos packed with fresh ingredients to light dinner wraps, these recipes fit seamlessly into your daily routine.

Energizing Breakfast Wraps

Starting the day with a nutrient-packed wrap fuels energy and productivity. Breakfast burritos can be filled with healthy ingredients like scrambled eggs, black beans, and avocado. Wrap them in whole wheat tortillas for an extra fiber boost.

For those who prefer plant-based options, vegan wraps with smashed chickpeas, spinach, and tomatoes are both quick and tasty. Add a dash of your favorite hot sauce to spice things up.

Add some fresh herbs like cilantro or parsley to enhance flavor. These wraps are not only quick to make but also convenient for busy mornings.

Satisfying Lunch Wraps

Lunch wraps are a fantastic way to enjoy a balanced and delicious meal midday. Options like a chicken salad wrap with tender pieces of chicken, lettuce, and a light dressing offer both protein and flavor.

For a vegetarian touch, a buffalo chickpea wrap combines spicy chickpeas with crunchy vegetables. Those craving a twist can try a spicy tuna wrap that includes tinned tuna, peppers, and a sprinkle of lemon juice.

Meanwhile, a California turkey club wrap offers a classic taste with a combination of turkey, bacon, and avocado. Using whole-grain pita bread adds additional nutrition, making these wraps an ideal choice for a quick lunch.

Light and Healthy Dinner Options

Dinner wraps provide a light yet satisfying end to the day. A mediterranean wrap featuring falafel, hummus, and crisp veggies such as cucumbers and bell peppers make a refreshing meal.

Another popular choice is the greek salad wrap, which incorporates feta cheese, olives, and tomatoes wrapped in soft pita bread. For a healthier twist on a favorite, a buffalo chicken wrap with grilled chicken and a touch of buffalo sauce brings bold flavor without excessive calories.

Whether you’re in the mood for veggie wraps or a chicken wrap, these options deliver on taste while supporting a balanced diet.

Healthy Wraps on the Go: Meal Prep and Storage

A stack of fresh vegetable wraps rolled tightly, showcasing layers of leafy greens, thinly sliced meat, and tortilla wrapsHealthy wraps offer a convenient and nutritious meal option. This guide focuses on efficient meal prep strategies and tips for keeping wraps fresh.

Meal Prep Strategies for Busy Lifestyles

Preparing wraps in advance can simplify meal planning. High-protein wraps and low-calorie wraps can be made ahead of time to save effort during the week.

Start by selecting nutritious ingredients like lean meats, fresh veggies, and whole-grain wraps. Lay out all components before assembly to streamline the process.

For variety and nutrition, try different combinations of proteins and vegetables. Wraps can feature items like grilled chicken or tofu paired with spinach, bell peppers, and tomatoes. Remember to keep portions balanced and avoid overfilling.

Making a batch of wraps can help ensure that healthy options are always available, avoiding last-minute choices.

Storing Your Wraps for Freshness

Proper storage keeps wraps appetizing and safe to eat. After assembling, tightly wrap each in foil or wax paper to maintain freshness. This prevents moisture from getting in.

Place wrapped DIY wraps in an airtight container, or use reusable bags for an eco-friendly alternative. Clearly label the wraps with their ingredients and the prep date.

Store them in the refrigerator if planning to eat within a few days. For longer storage, wraps can be frozen. Just thaw in the fridge overnight before eating. These storage methods ensure wraps remain delicious and ready to enjoy anytime.

Nutritional Advantages of Wraps

A plate featuring a chicken salad wrap topped with melted cheese, accompanied by fresh lettuce and diced vegetables on a green tableWraps offer a flexible way to create meals that meet your dietary goals. Healthy wraps can be low calorie, high protein, or gluten free depending on the ingredients chosen.

Calorie Count and Macronutrient Balance

Wraps can be customized to suit various nutritional needs. A low calorie wrap might use lettuce instead of a tortilla to save on carbs and calories. Protein wraps often include chicken, beans, or tofu, providing a satisfying meal with high protein content.

Balancing macronutrients is simple with wraps. Include lean proteins, healthy fats like avocado, and fibrous vegetables. This combination not only supports a well-rounded diet but also keeps energy levels steady throughout the day.

Making Your Wraps Work Within Various Diets

Wraps are adaptable, fitting many dietary plans. For those seeking low carb options, using large leafy greens as wraps reduces carbohydrate intake. High protein needs can be met with protein wraps that include ingredients like grilled chicken or chickpeas.

Creating gluten free wraps is easy by selecting gluten free tortillas or using alternative wrap bases. By considering specific ingredients, anyone can enjoy healthy wrap recipes tailored to their dietary preferences, ensuring a meal that aligns with personal health goals.

Frequently Asked Questions

A spread of grilled chicken, crispy fries, and fresh chicken salad wraps wrapped in lettuce, served with barbecue sauce on a rustic tableSalad wraps offer diverse options for creating tasty and nutritious meals. From vegetarian fillings to flavorful choices, there are many ways to enjoy these wraps while focusing on health and taste.

What are some vegetarian filling options for healthy salad wraps?

For a delicious vegetarian wrap, consider using roasted vegetables, such as bell peppers and zucchini. Add protein with chickpeas or lentils. Avocado and hummus can add creaminess and flavor. Experiment with different greens like spinach or arugula for a fresh twist.

How can I make a salad wrap that is both nutritious and conducive to weight loss?

Choose whole grain wraps for higher fiber content. Load your wrap with various vegetables and lean proteins like grilled chicken or tofu. Light dressings or a squeeze of lemon can add flavor without extra calories. Portion control and balanced ingredients help in weight management.

What are some quick and easy filling ideas for a healthy wrap?

For a quick meal, combine turkey slices, fresh spinach, and a dollop of mustard. Try sliced apples with almond butter and a sprinkle of cinnamon for a sweet variation. Tuna salad with cucumbers and cherry tomatoes provides a refreshing option that is simple to prepare.

Can you suggest healthy tortilla wrap recipes that are good for any meal?

Try a breakfast wrap with scrambled eggs, spinach, and salsa in a whole-wheat tortilla. For lunch, use turkey, avocado, and lettuce. A dinner option could include grilled salmon with quinoa and a squeeze of lime juice. These tortillas provide tasty options throughout the day.

What are some creative ways to serve wraps for dinner?

Present wraps as a “build-your-own” station for family dinners. Provide a selection of fillings like grilled vegetables, different cheeses, and various proteins. Create wrap bowls by serving the fillings over grain like quinoa or rice. Wraps can also be cut into pinwheels for easy sharing.

How do I ensure my salad wraps are healthy while still being flavorful?

Choose high-quality ingredients like fresh produce and herbs. Use spices and herbs such as basil, cilantro, or paprika to add robust flavors without extra calories. Light sauces or tangy salsas can enhance taste while keeping the wrap healthy. Balance the flavors to please the palate.

0 comments
0 FacebookTwitterPinterestEmail
A Step-by-Step Guide for Beginners in Contouring

With the power to sculpt and enhance our facial features, these techniques have gained immense popularity in recent years. However, for those who are new to the world of makeup, the thought of contouring and highlighting can be overwhelming and intimidating. With the vast array of products and techniques available, it can be challenging to know where to start. That’s where we come in. In this article, we will guide you through the fundamentals of contouring and highlighting, from choosing the right products to application techniques, to help you achieve a flawless and effortless look. So, whether you are a beginner seeking to enhance your makeup skills or someone looking to refresh your knowledge, our step-by-step guide will equip you with the necessary tools and knowledge to master the art of contouring and highlighting.


First, Prep Your Face: Moisturize

Before diving into the fascinating world of contouring and highlighting, it’s crucial to give our faces the TLC they deserve. Moisturizing is the first step in achieving a flawless and long-lasting makeup look. We all know that feeling of dry, tight skin, especially during those colder months. So, let’s grab our favorite moisturizer and pamper our faces with a generous application. Moisturizing not only hydrates our skin, but it also creates a smooth canvas for our makeup application. Remember, a well-prepped face is the key to a stunning and flawless contour and highlight look. So, let’s give our skin that extra boost of hydration before we embark on this makeup journey.


Choose A Contour Shade

When it comes to choosing a contour shade, it’s important to consider our individual skin tones and preferences. One rule of thumb is to go for a shade that is two to three shades darker than our natural skin tone. This will create a more natural-looking shadow and definition. However, it’s crucial not to go too dark, as it can result in a harsh and unnatural effect. Experimenting with different shades and undertones can help us find the perfect match for our desired look. Whether we prefer a cool-toned contour or a warmer bronzed effect, selecting the right shade can make a significant difference in achieving a beautifully sculpted face. So, let’s have fun exploring different contour shades and embrace the magic of creating dimension and definition in our makeup routine.


Blend Your Contour Like Crazy

Now that we have found the perfect contour shade, it’s time to blend it like crazy! Blending is the key to achieving a seamless and natural-looking contour. Grab a soft, fluffy brush and start blending the contour shade into the hollows of our cheeks, along the jawline, and on the temples. Remember to use light, feathery strokes and blend in circular motions to avoid any harsh lines. Don’t forget to blend upwards towards the hairline to create a more lifted effect. Take your time and keep blending until the contour seamlessly melts into our skin, creating that coveted chiseled effect. So, let’s grab our brushes and blend away to achieve a flawlessly sculpted look that will have everyone asking for our contouring secrets!


Next, Grab A Highlighter

Now that we have our perfectly blended contour, it’s time to add a touch of glow with a highlighter. This step will bring light and radiance to our features, creating a beautiful contrast to the shadows created by the contour. So, let’s grab a highlighter and get ready to shine! Choose a shade that complements our skin tone – whether it’s a soft champagne or a golden hue, find one that suits our preferences. Using a small, fluffy brush, apply the highlighter to the high points of our face – the cheekbones, the bridge of the nose, the cupid’s bow, and the brow bone. With a light hand, gently sweep the product onto these areas and blend it in for a natural, luminous effect. The key is to not overdo it – a subtle glow is what we’re aiming for. So, let’s embrace our inner glow and get ready to shine bright with our highlighter!


Apply Highlighter To High Points

Now that we’ve mastered the art of contouring, it’s time to take our look to the next level by applying highlighter to the high points of our face. This step is all about adding that gorgeous glow and enhancing our natural features. We want to achieve a luminous effect that catches the light in all the right places. Using a small, fluffy brush, we can gently sweep the highlighter onto our cheekbones, the bridge of our nose, our cupid’s bow, and our brow bone. Remember, less is more when it comes to highlighter – a subtle shimmer goes a long way. So let’s embrace our inner radiance and let our high points shine!


Blend Out Any Harsh Lines

To complete our flawless contour and highlight look, it’s crucial to blend out any harsh lines we may have created during the application process. We want our makeup to seamlessly blend together, creating a natural and cohesive finish. Using a clean blending brush or a damp beauty sponge, we gently blend the contour and highlight shades together, focusing on the areas where they meet. By softly diffusing any harsh lines, we create a soft, gradient effect that looks effortless and polished. This step ensures that our contour and highlight seamlessly melt into our skin, giving us that coveted airbrushed finish. So let’s take a moment to blend away any imperfections and achieve a flawlessly sculpted and illuminated look.


Time For Some Baking Action

Now that our contour and highlight are perfectly blended, it’s time for some baking action. Baking is a technique often used in makeup to set our under-eye concealer and create a smooth, crease-free finish. To bake, we take a loose translucent powder and apply a generous amount to the areas where we applied concealer, typically under the eyes and on the center of the forehead. We let the powder sit on our skin for a few minutes, allowing the natural heat from our face to set the makeup. During this time, we can work on other areas of our face or even sip on our favorite beverage. After a few minutes, we gently dust off the excess powder, revealing a flawlessly smooth and brightened under-eye area. The result is a long-lasting, crease-free look that withstands the test of time. So, let’s grab our favorite powder, take a baking break, and achieve a flawless finish that lasts all day.


Dust Off Excess Powder Gently

To ensure a seamless and impeccable finish, we want to make sure we handle the dusting off of excess powder with care. After allowing the baking process to work its magic, we delicately brush away any remaining powder using a fluffy brush. It’s important to be gentle during this step to avoid disrupting the makeup we’ve carefully applied. A light sweeping motion across the areas where we applied the powder will effortlessly remove any excess, leaving behind a flawless and polished look. Remember, precision and finesse are key, so take your time and enjoy the satisfying moment of revealing a beautifully set and highlighted face.


Grab A Fluffy Brush For Blush

When it comes to adding the perfect flush of color to our cheeks, we reach for our trusty fluffy brush. It’s the ideal tool for seamlessly blending and diffusing blush onto our skin. The soft bristles pick up just the right amount of product and distribute it evenly for a natural and radiant finish. With a few gentle sweeps along the apples of our cheeks, we can instantly transform our complexion into a fresh and youthful glow. So next time you’re applying your makeup, don’t forget to grab a fluffy brush for blush – it’s the secret weapon to achieving that lit-from-within radiance.


Finish With A Setting Spray

And finally, after we’ve perfected our contouring and highlighting techniques, it’s time to lock it all in with a setting spray. This magical mist is the ultimate finishing touch that ensures our hard work stays in place all day long. A few spritzes of the setting spray not only help to seal our makeup but also give our skin a beautiful, dewy finish. It’s like a protective shield for our perfectly sculpted cheekbones and illuminated features. Plus, the refreshing mist feels so luxurious and invigorating on our skin. So, before we step out the door, let’s give our makeup that final touch of perfection with a setting spray and confidently rock our flawlessly contoured and highlighted look throughout the day.


And there you have it, folks! We have reached the end of our step-by-step guide to contouring and highlighting. Whether you’re a makeup novice or a beauty pro, these techniques are sure to enhance your natural features and give you that coveted sculpted look. Remember, practice makes perfect, so don’t be discouraged if it takes a few tries to get it right. Now go forth and slay with your perfectly contoured and highlighted face!


0 comments
0 FacebookTwitterPinterestEmail
Makeup Brushes and Tools: A Comprehensive Guide

Whether you are a beginner or a seasoned pro, having the right makeup brushes and tools can make all the difference in the outcome of your makeup application. With the vast array of options available in the market, it can be overwhelming and confusing to know which brushes and tools to invest in. That is why I have created this comprehensive guide to help you navigate through the world of makeup brushes and tools. In this article, I will share my knowledge and expertise to help you understand the different types of brushes and tools, their uses, and how to properly care for them. By the end of this guide, you will have a better understanding of how to build your own makeup brush and tool collection, allowing you to achieve flawless makeup looks every time. So, let’s dive in and discover the world of makeup brushes and tools together.


My Must-Have Makeup Brush Collection

I have spent years experimenting with different makeup brushes and tools, and I have finally curated my must-have collection that I can’t live without. First up is the fluffy powder brush. It’s perfect for setting my foundation with a light dusting of powder, ensuring a smooth and flawless finish. Then, I can’t go without my trusty blending brush. This versatile brush is essential for seamlessly blending eyeshadow colors and creating those stunning smoky eye looks. Another staple in my collection is the angled brush. Whether I’m perfecting my brows or creating a precise winged eyeliner, this brush is my go-to for achieving sharp and defined lines. Lastly, I can’t forget about my favorite brush for applying foundation – the dense, flat-top kabuki brush. It effortlessly buffs in the product, giving me that airbrushed look. These brushes have become my go-to tools for creating my everyday makeup looks and experimenting with new styles.


Let’s Talk About Foundation Brushes

When it comes to achieving a flawless foundation application, foundation brushes are a game-changer. I can’t stress enough how much of a difference using the right brush can make to your makeup routine. Personally, I’ve found that using a densely packed, flat-top kabuki brush works wonders for creating a seamless and airbrushed finish. The bristles are perfectly designed to buff in the foundation, ensuring that it blends into the skin effortlessly. The result? A natural-looking base that doesn’t cake or settle into fine lines. So, if you’re looking to upgrade your foundation game, investing in a quality foundation brush is definitely worth it. Trust me, once you try it, you’ll never go back to applying foundation with your fingers or using a sponge.


Get Your Blush Game On Point

To achieve that perfect flush of color on your cheeks, mastering the art of blush application is key. I’ve learned through trial and error that the right brush can make all the difference. Personally, I love using a fluffy angled brush for applying blush. The angled shape helps me to precisely place the product on the apples of my cheeks, creating a natural-looking flush. I also find that the soft bristles of the brush allow for seamless blending, ensuring that the color looks effortlessly blended into my skin. So, if you want to take your blush game to the next level, don’t underestimate the power of a good blush brush. Trust me, it’s a game-changer.


The Secret To Flawless Blending

When it comes to achieving a flawlessly blended makeup look, there’s a secret that has revolutionized my routine. It’s all about the power of a damp beauty sponge. Yes, you heard me right! This little sponge has completely changed the way I apply and blend my foundation and concealer. By dampening the sponge before use, it helps to sheer out the product and create a natural, airbrushed finish. The soft and bouncy texture of the sponge allows for seamless blending, effortlessly smoothing out any harsh lines or uneven patches. I simply dab and bounce the sponge over my skin, and voila! Flawless, blended perfection. Trust me, incorporating a damp beauty sponge into your makeup routine will take your blending skills to the next level. It’s been a game-changer for me, and I’m sure it will be for you too.


Why Every Girl Needs Liner Brushes

As someone who loves experimenting with different eye makeup looks, I’ve discovered that liner brushes are an absolute must-have in my collection. These little brushes may seem insignificant, but trust me, they make a world of difference in achieving precise and flawless eyeliner application. Whether it’s creating a sleek winged liner or smudging out a smoky eye, liner brushes offer ultimate control and precision. The fine, angled bristles allow for easy maneuvering along the lash line, ensuring a clean and sharp finish every time. They also come in handy when working with gel or cream eyeliners, as they help to evenly distribute the product for a smooth and professional-looking result. So, ladies, if you want to elevate your eye makeup game and achieve those perfectly defined eyes, investing in a set of liner brushes is a game-changer you won’t regret. Trust me, these tiny brushes will become your new best friends in no time!


Mastering The Art Of Eye Shadow

When it comes to mastering the art of eye shadow, there are a few key tips and tricks that have helped me elevate my makeup game. First and foremost, primer is a game-changer. Applying a small amount of eye shadow primer all over the eyelids helps to create a smooth canvas and ensures that the colors pop and stay in place all day long. Another essential tool in my arsenal is a fluffy blending brush. This brush allows me to seamlessly blend different shades together for a seamless and well-blended eye look. I also like to use a smaller, denser brush for applying darker shades to the outer corner of my eyes to create depth and dimension. Lastly, don’t be afraid to experiment with different colors and finishes. From shimmery metallics to matte neutrals, the possibilities are endless when it comes to eye shadow. Remember, practice makes perfect, so don’t be discouraged if it takes some time to get the hang of it. With a little patience and the right tools, you’ll soon be creating stunning eye shadow looks that make heads turn.


Highlight Like A Pro, Honey

When it comes to achieving that gorgeous, radiant glow, I’ve learned a few tips and tricks that have taken my highlighting game to the next level. First off, finding the right shade of highlighter is crucial. I like to choose one that complements my skin tone, whether it’s a soft champagne or a dazzling gold. Secondly, the placement is key. I love to apply highlighter to the high points of my face where the light naturally hits, such as the cheekbones, the bridge of the nose, and the cupid’s bow. A fan brush is my go-to tool for a perfect application, allowing me to sweep the product on effortlessly and blend it seamlessly into my skin. Lastly, don’t forget to build up the intensity gradually. It’s all about that subtle, lit-from-within glow, so start with a light hand and build up until you achieve the desired radiance. So go ahead, highlight like a pro, honey, and let your inner glow shine!


The Unsung Heroes: Lip Brushes

Now, let’s talk about the unsung heroes of our makeup collection: lip brushes. These small, slender brushes often get overlooked when it comes to creating the perfect pout, but let me tell you, they can make all the difference. First of all, using a lip brush allows for precise application, ensuring that your lipstick or lip gloss stays within the lines and doesn’t smudge all over your face. It also allows you to control the intensity of the color, whether you want a sheer wash or a bold, statement-making lip. Additionally, lip brushes help to evenly distribute the product, ensuring a smooth and flawless finish. Trust me, once you give a lip brush a try, you’ll wonder how you ever applied your lip products without it. So, don’t underestimate the power of these little tools and let them elevate your lip game to new heights of perfection.


Keeping Your Brushes Clean AF

I have to admit, I used to be pretty lazy when it came to cleaning my makeup brushes. I mean, who has the time or energy to scrub every single brush after each use, right? But let me tell you, keeping your brushes clean AF is a game-changer. Not only does it prevent breakouts and keep your skin healthy, but it also ensures that your makeup applies flawlessly every time. Trust me, there’s nothing worse than trying to blend out your eyeshadow with a brush that’s caked with old product. So, here’s my secret weapon: a gentle brush cleanser and a silicone brush cleaning mat. I simply swirl my brushes in the cleanser, gently massage them on the mat, and rinse until the water runs clear. It’s quick, easy, and keeps my brushes looking and performing their best. Don’t let dirty brushes hold you back from achieving that perfect makeup look – keep them clean AF and watch the magic happen.


Investing In Quality Tools Pays Off

When it comes to makeup, investing in quality tools is a total game-changer. Sure, you might be tempted to save a few bucks and opt for the cheap brushes and tools, but trust me, it’s worth splurging on the good stuff. I’ve learned this the hard way after wasting money on flimsy brushes that shed like crazy and sponges that soaked up more product than they applied. But once I decided to invest in high-quality brushes and tools, I never looked back. Not only do they last longer, but they also make a world of difference in the application and finish of my makeup. The bristles are soft and gentle, allowing for precise and effortless blending, while the tools are sturdy and reliable. So, take my advice and don’t skimp on quality – your makeup game will thank you in the long run.


Overall, as a makeup enthusiast and self-proclaimed beauty guru, I have learned that having the right brushes and tools can truly elevate your makeup game. From fluffy blending brushes to precise eyeliner tools, each one plays an important role in creating the perfect look. Don’t be afraid to experiment and find what works best for you, and remember to regularly clean and maintain your brushes for the best results. With this guide, you’ll be well on your way to becoming a makeup pro in no time. Happy blending!

0 comments
0 FacebookTwitterPinterestEmail